

How To Do Woodland Animal Christmas Ornaments
We've been having and then much fun with Christmas crafting! Our latest project is these Woodland Animal Christmas ornaments. Felt is such a peachy material to craft with because it's cheap and comes in so many fun colors.
I've included printable patterns for each animal at the bottom of this post, and I think that kids volition have a blast making these ornaments! And of grade, adults will relish making them too – I did!
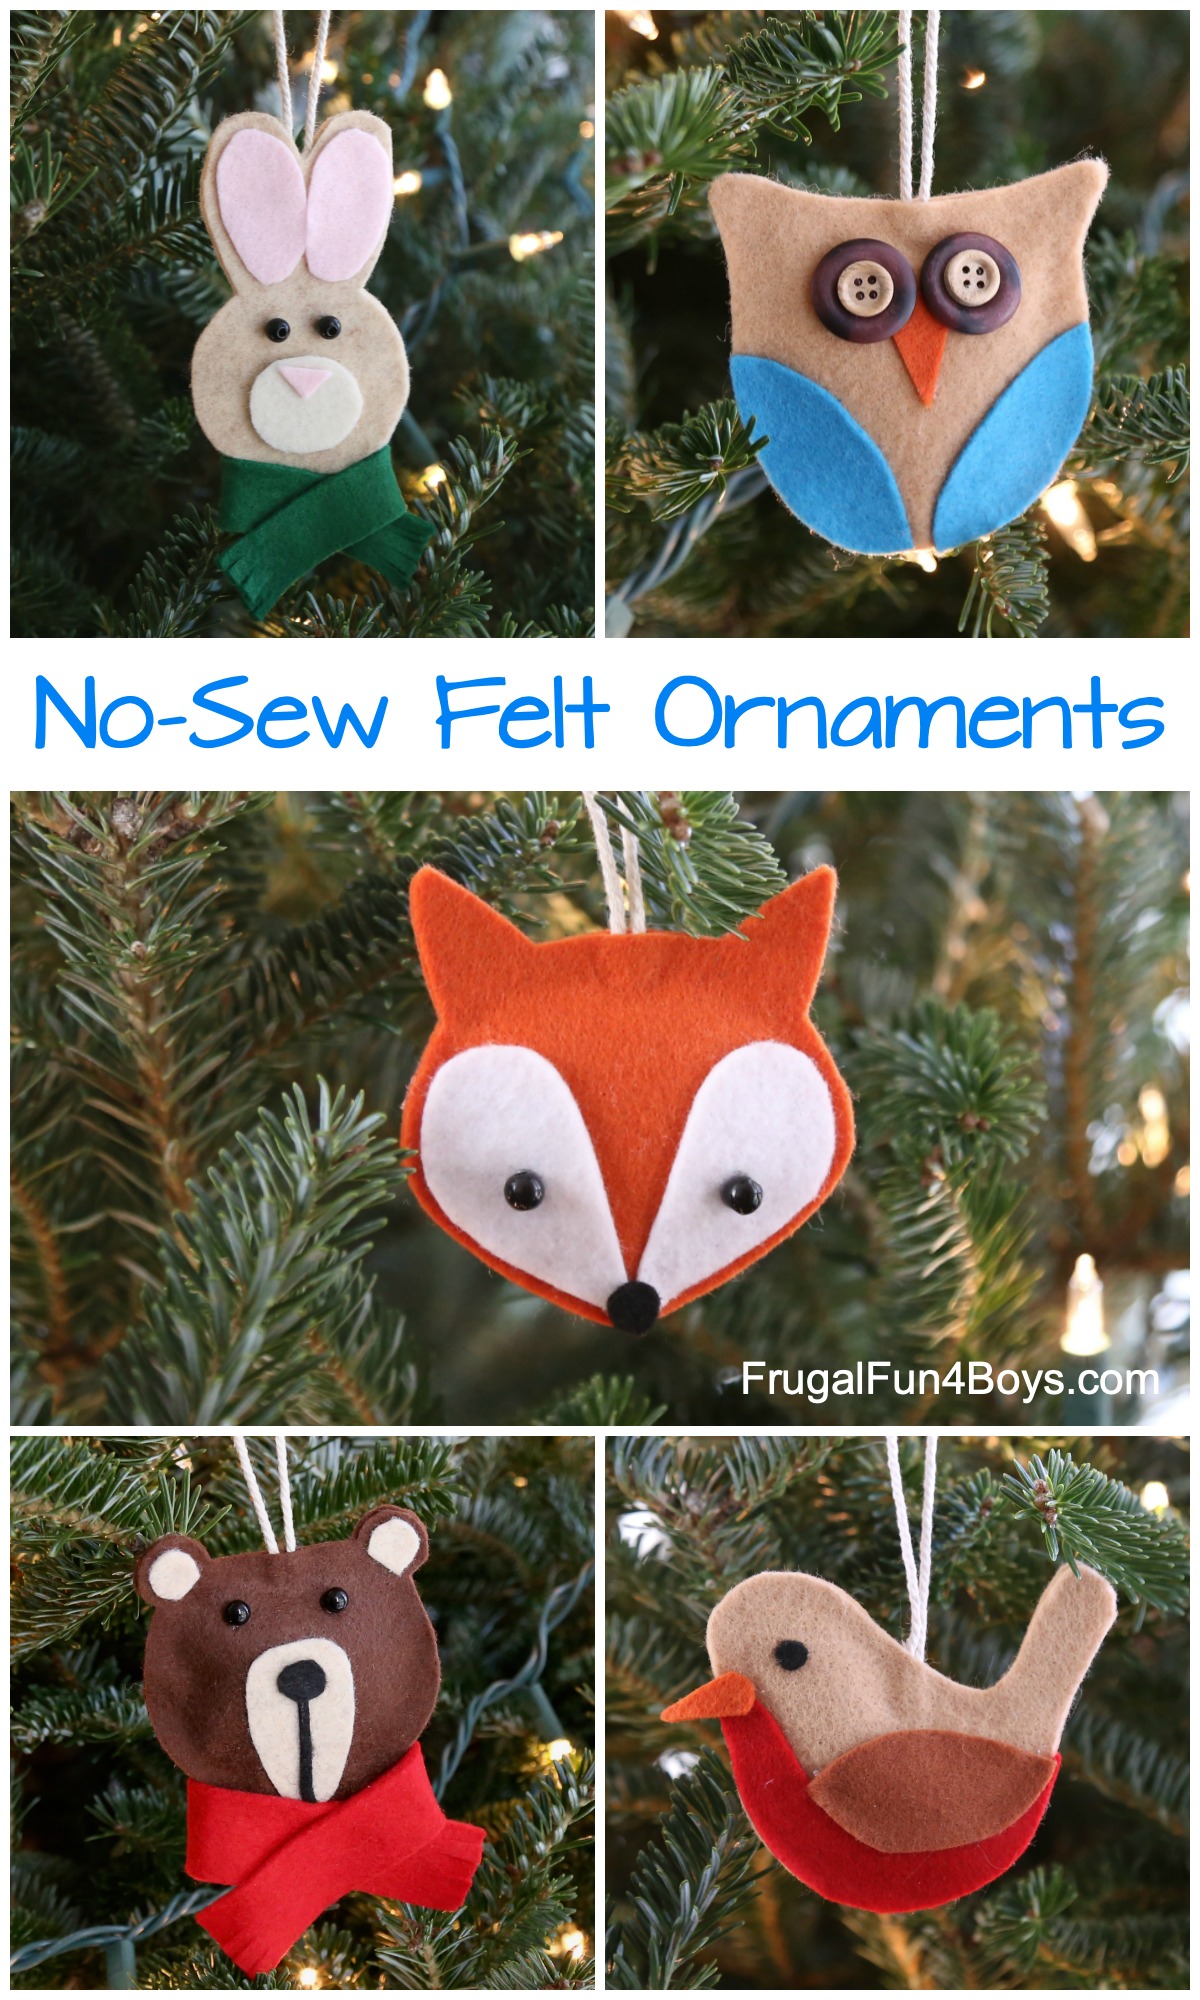
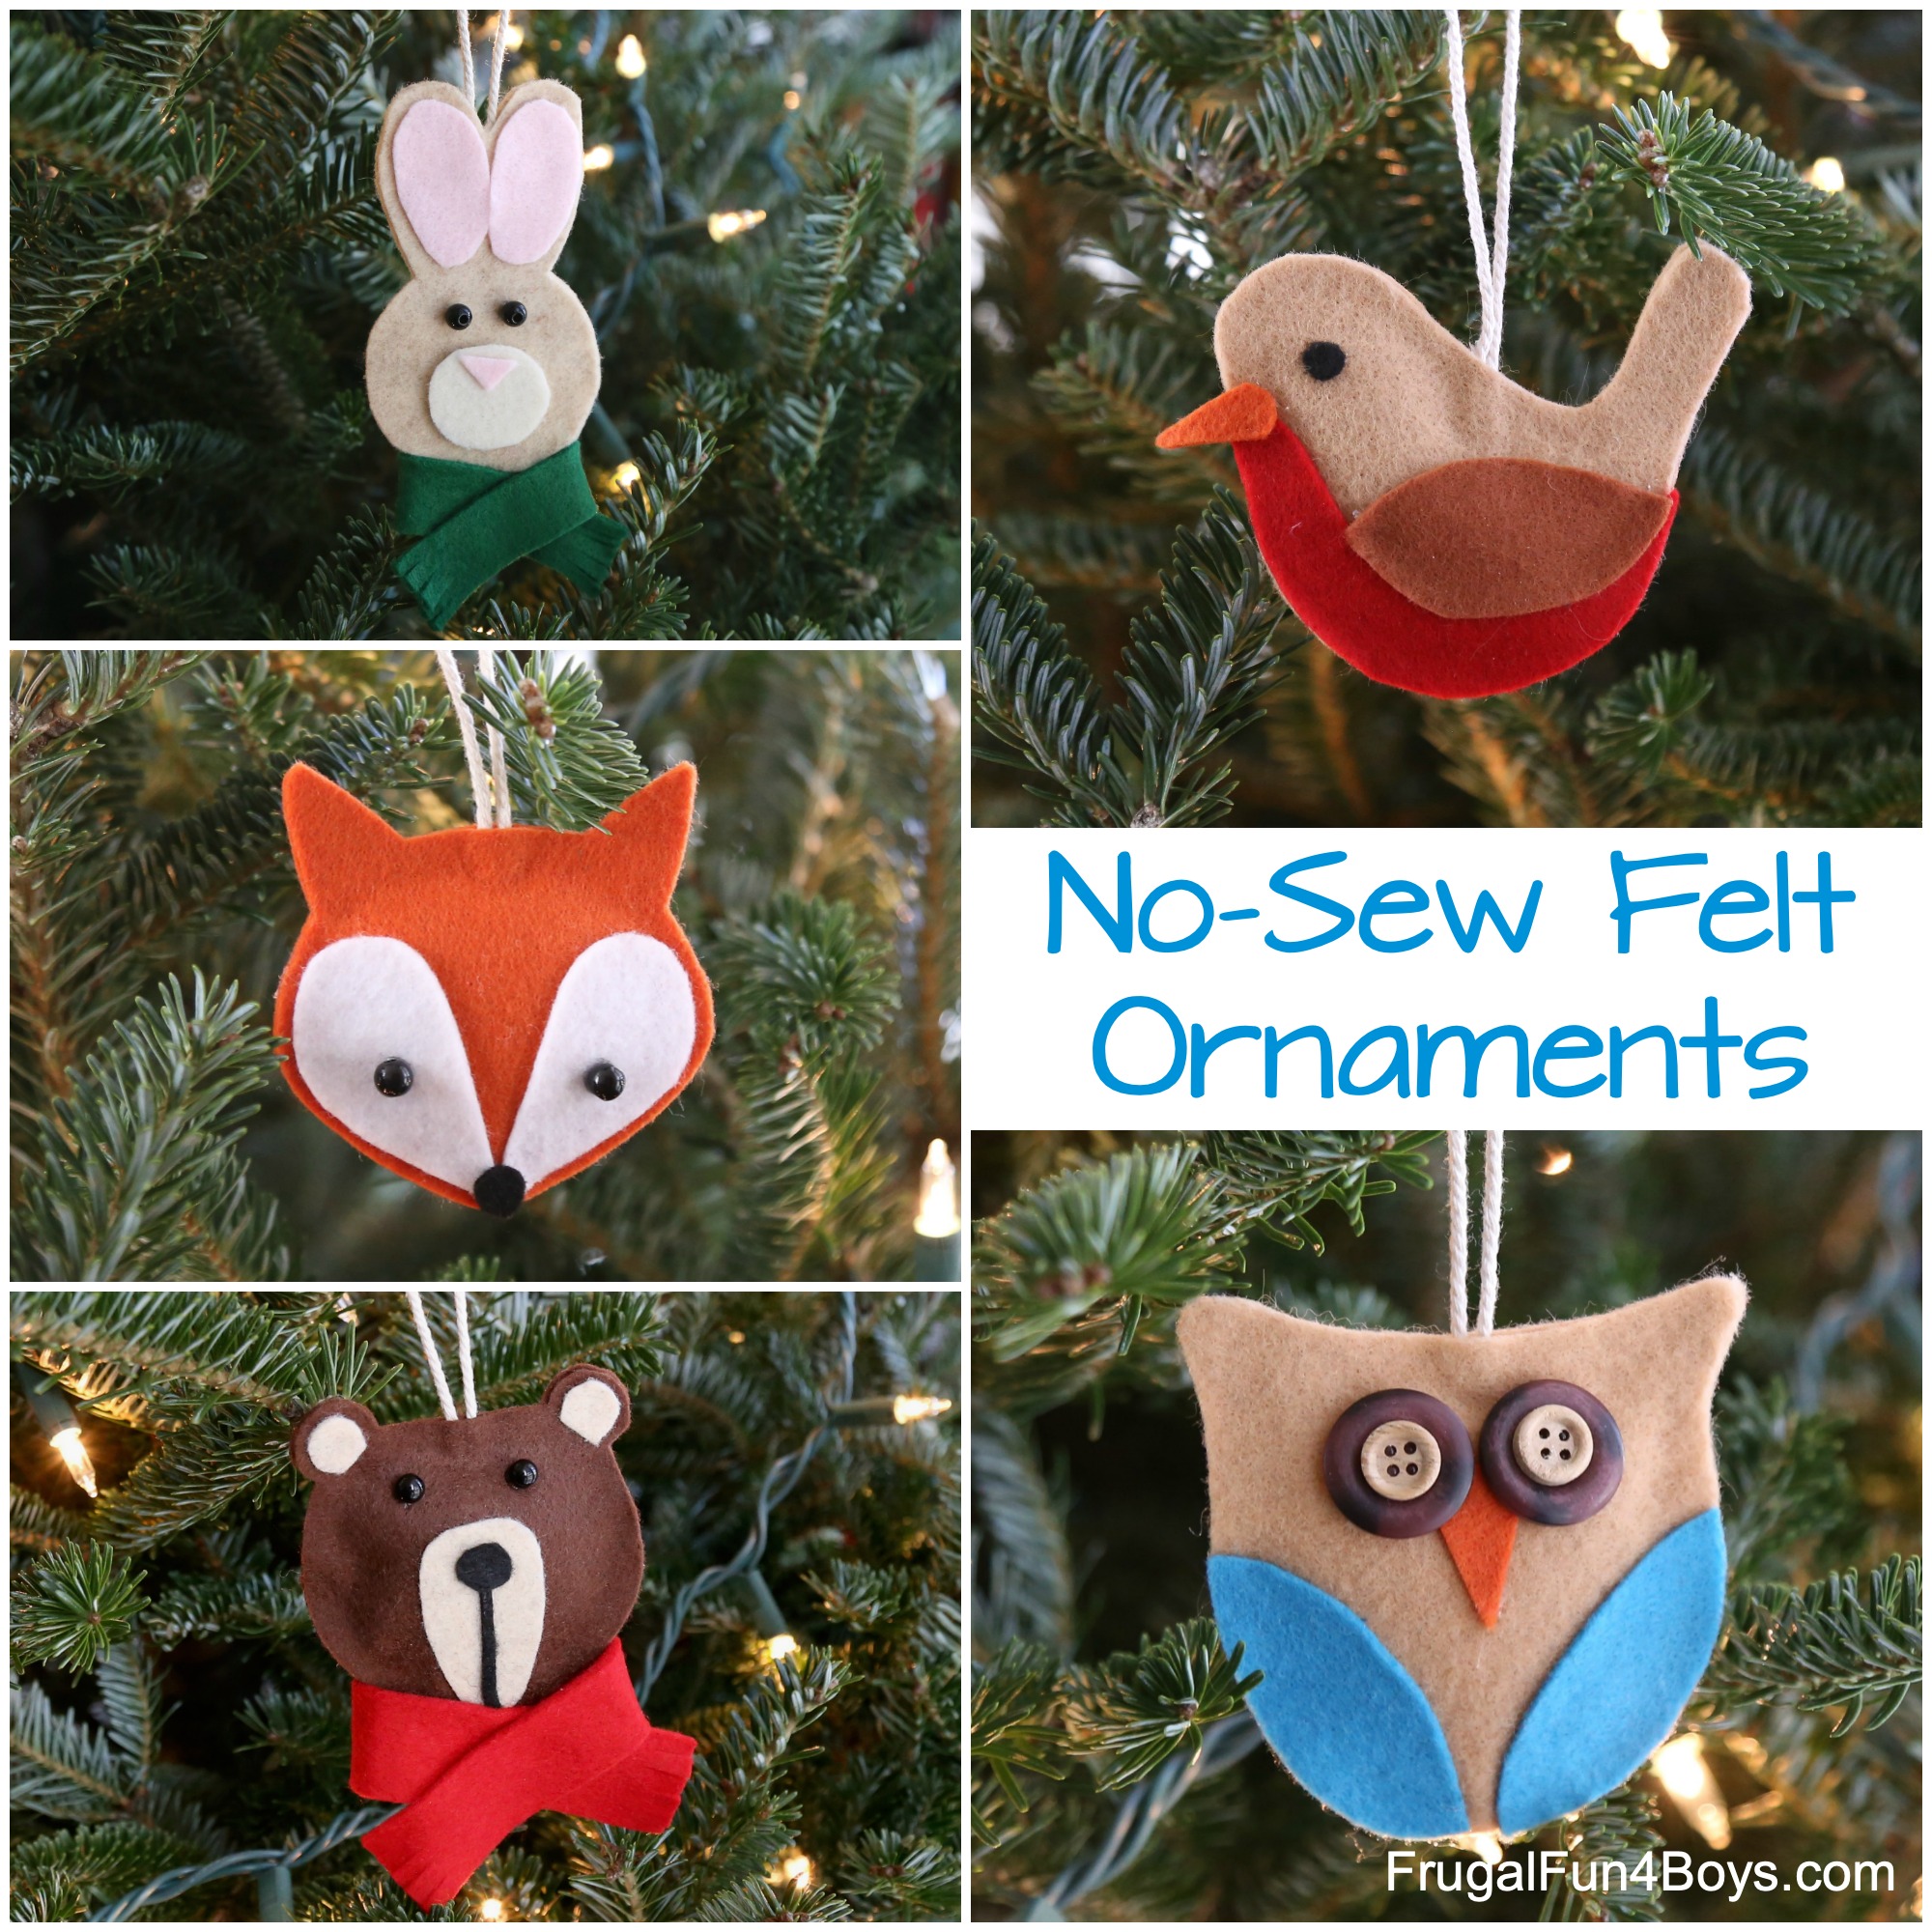
There are 5 creature ornaments to brand: a bunny, a bear, an owl, a robin, and a play tricks. Information technology's so hard to choose a favorite!
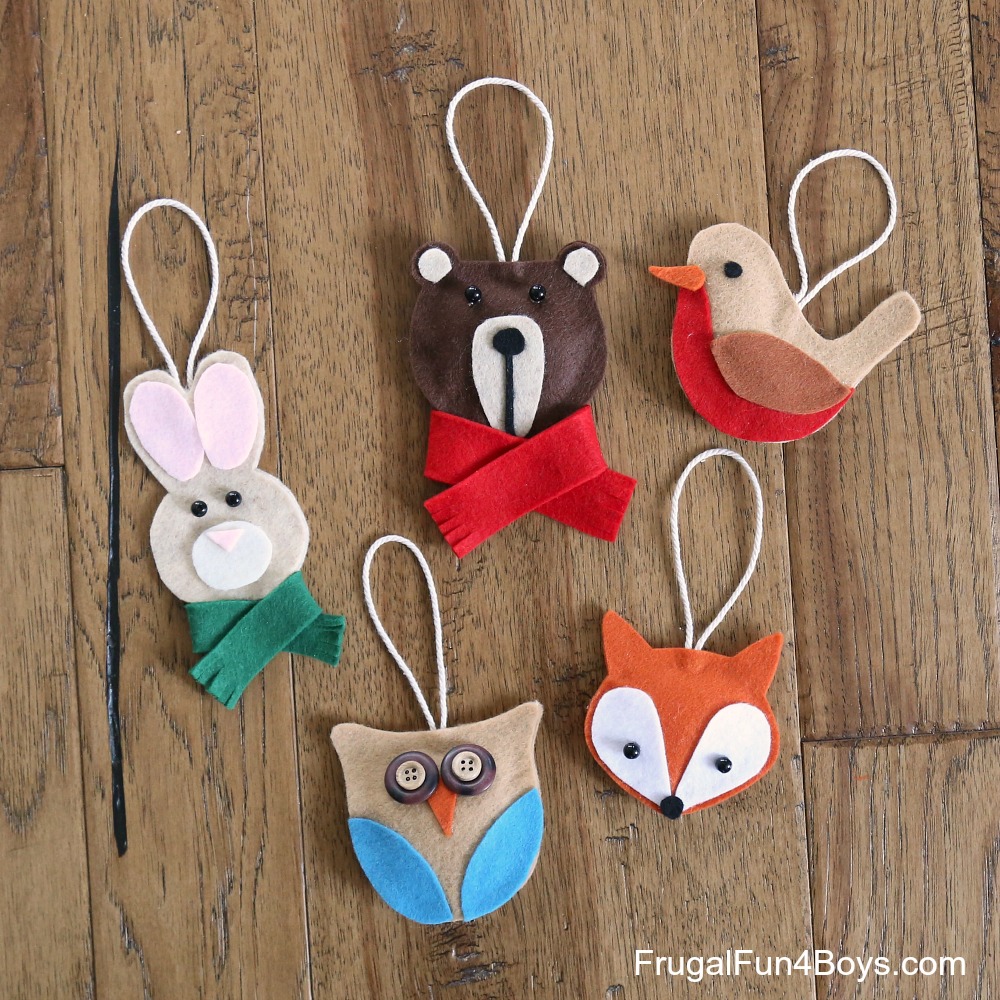
You can make these ornaments by sewing a coating stitch around the edges of the felt, but hot glue works but as well. Okay, maybe the coating sew together would be a piffling more beautiful, only I remember these turned out actually adorable!
Supplies Needed:
Patterns – impress beneath
Felt in lots of fun colors
Fiber fill stuffing
Hot mucilage or Tacky Glue
Pair of scissors
Small black beads for eyes
Buttons for the owl's eyes
Yarn or ribbon for hanging the ornaments – I used an all-cotton natural colored yarn
How to Gather the Ornaments
I recommend pinning the patterns to the felt – it makes it much easier to cut them out.
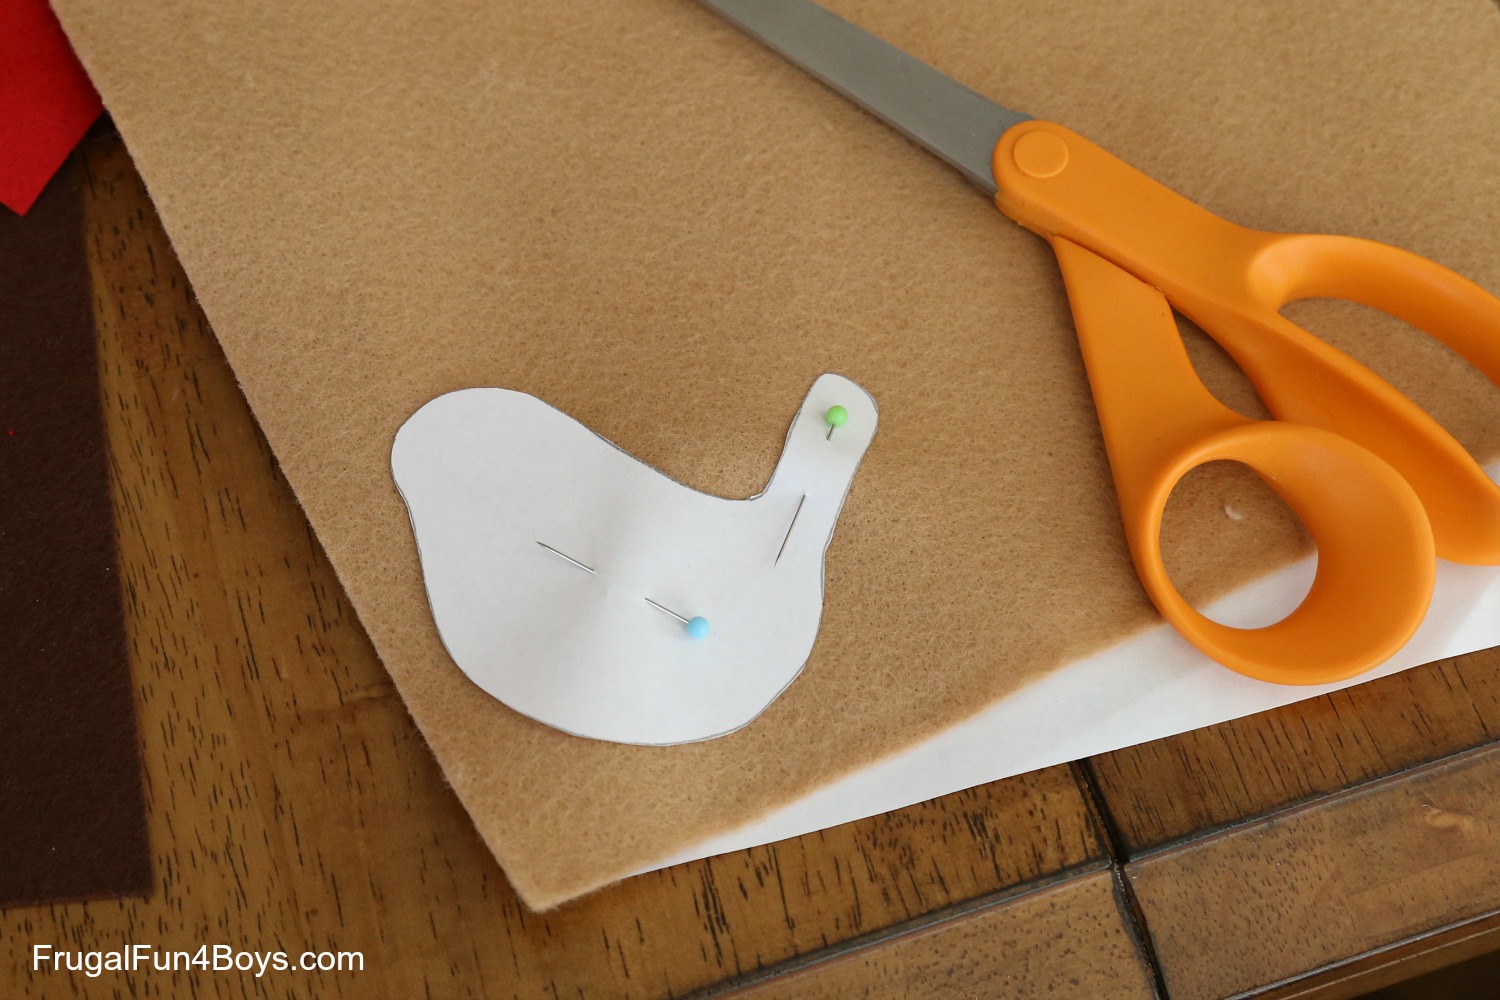
You'll desire to cutting two of each animal's shape. Then cutting out the detail pieces and glue them on. We used hot gum, simply Tacky Glue works well also. I used Tacky Gum for the sparse line on the carry's nose – information technology was too thin to hot glue without burning my fingers!
The deport, fox, and bunny take bead optics that are hot glued on. (Don't use too much glue – you don't want information technology to ooze around the edges!)
Cut a piece of yarn for hanging the ornamentation.
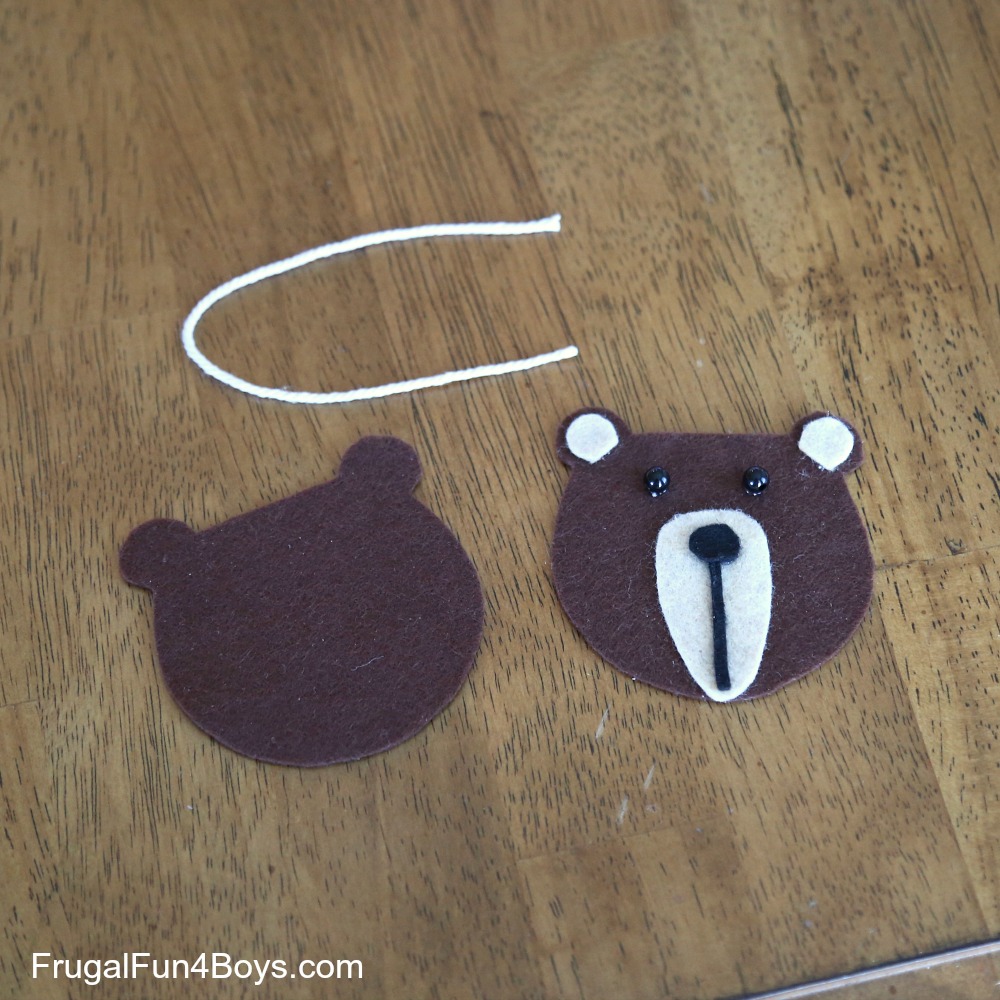
Glue the string to the lesser of the head before gluing the head pieces together.
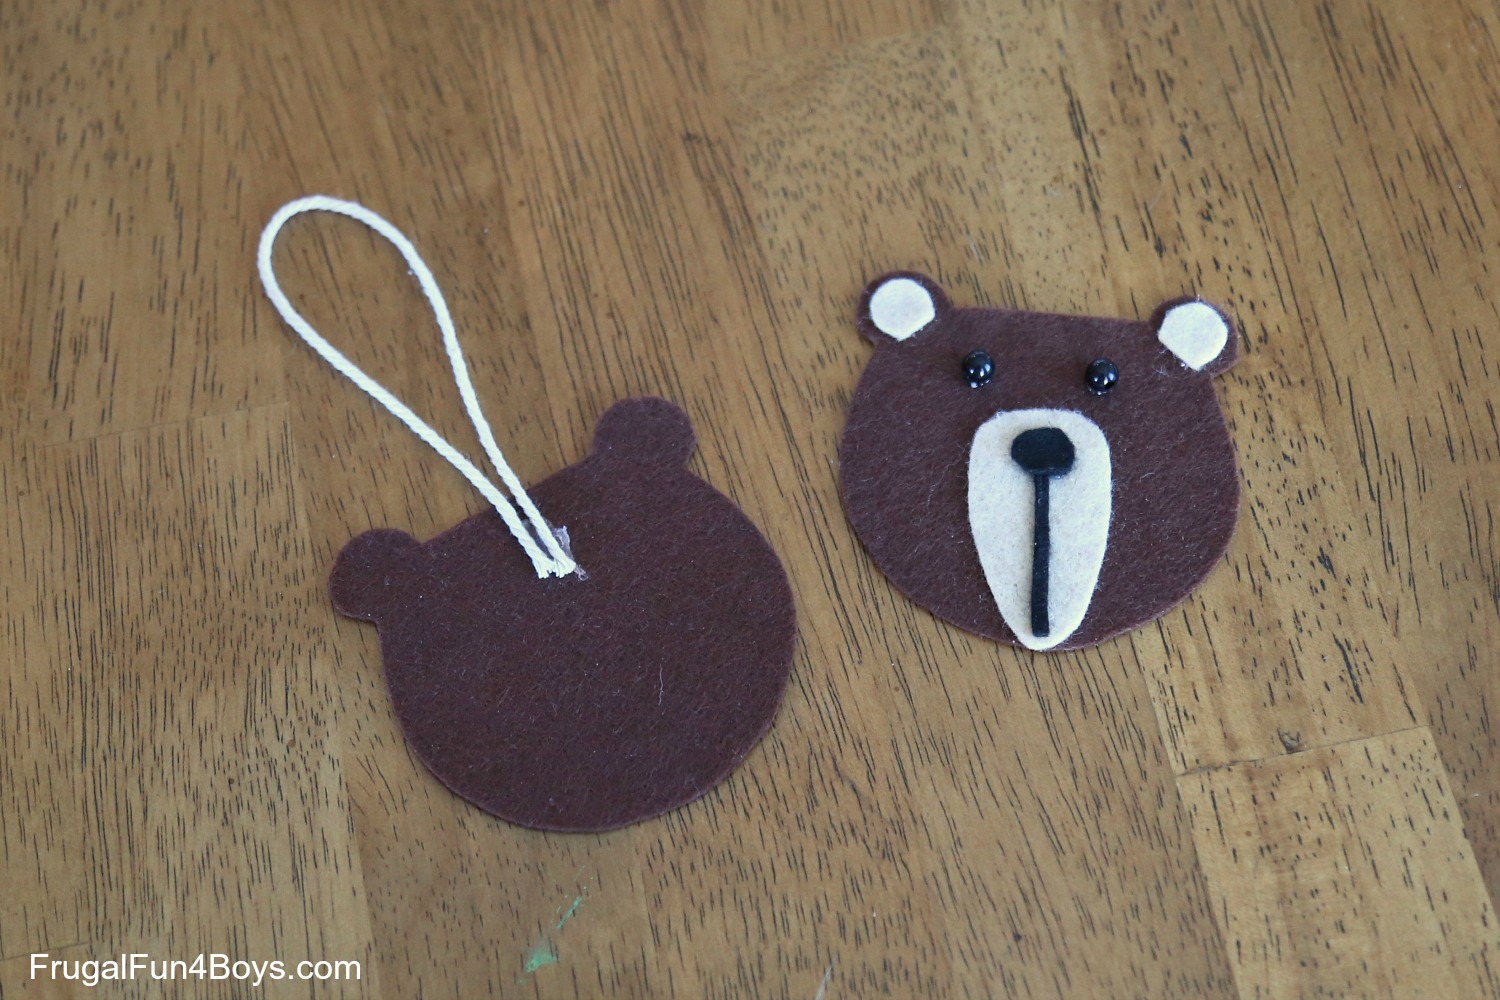
Then put glue effectually the ears and the top of the head. Glue the edges of the felt only and then that you can stuff the center with a little fiber fill stuffing.
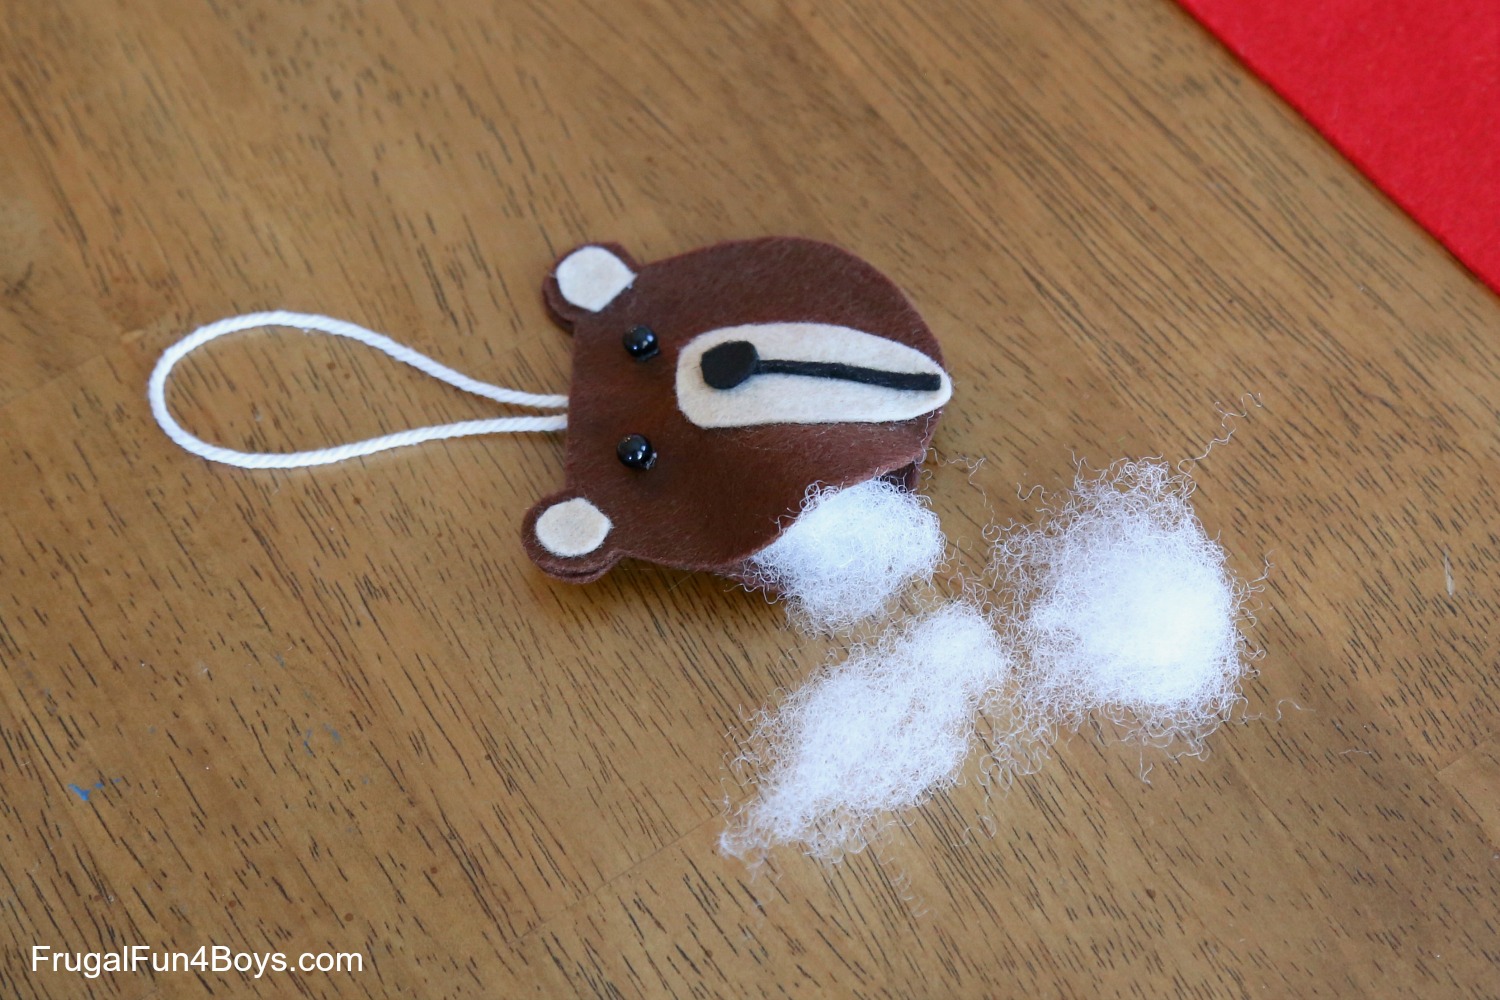
Glue all the mode around the head, simply get out a niggling opening for the stuffing. It doesn't take much stuffing! Push it in, and then glue the last section of the head closed.
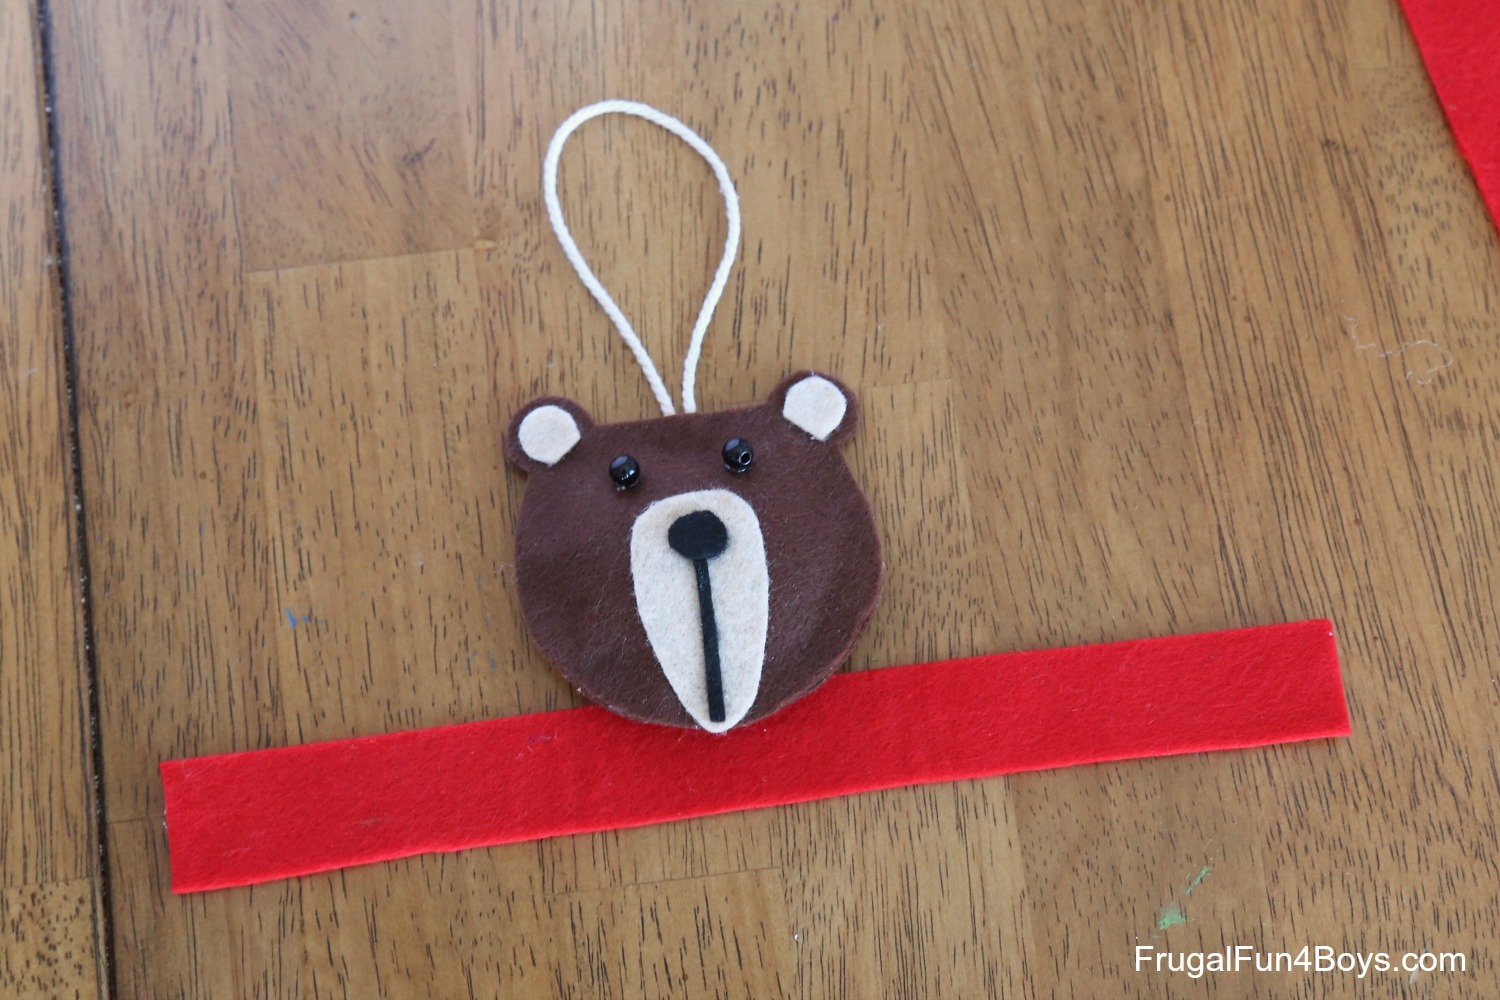
Cutting a strip of felt to make the scarf. I used extra thick felt that we bought at Hobby Foyer. Gum the scarf to the lesser of the back of the comport's head.
Then fold it over and tack information technology down with more mucilage.
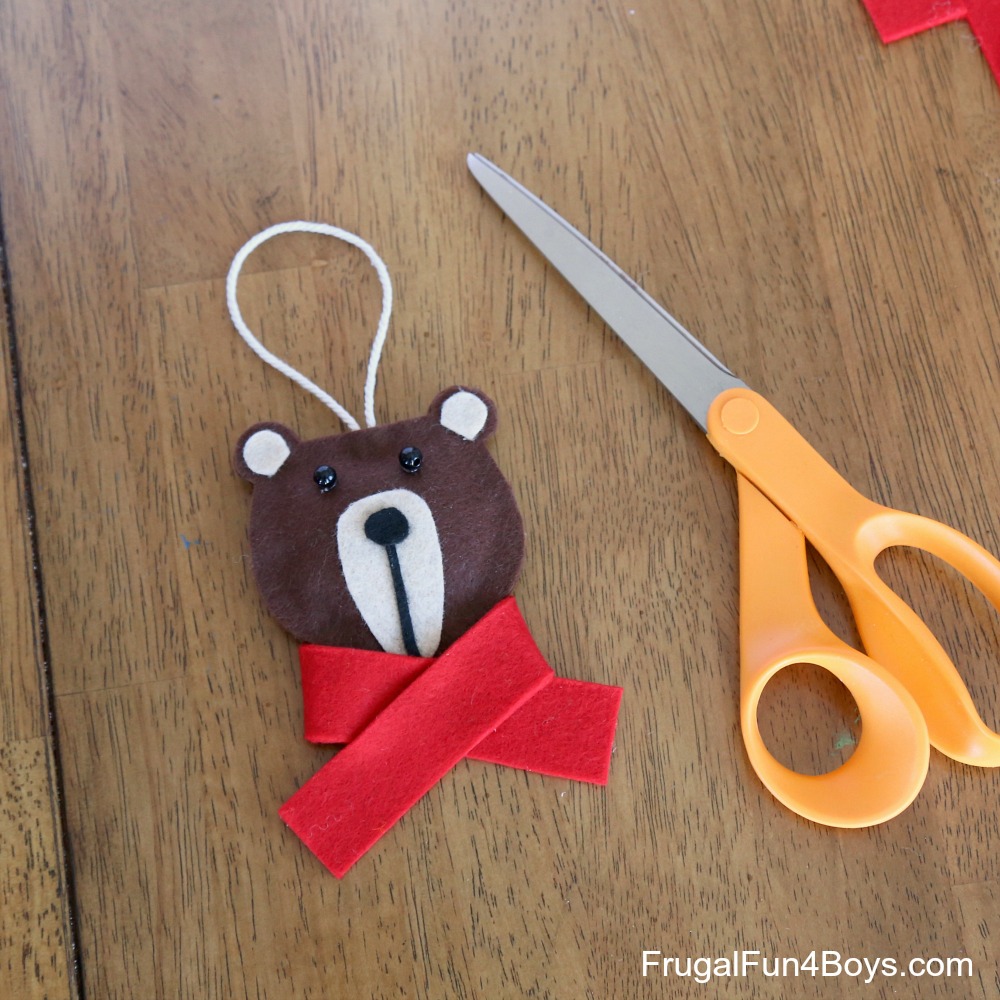
After y'all glue the scarf, trim the edges then that they are even and cutting some fringe. Then hang him on the tree! And then adorable!

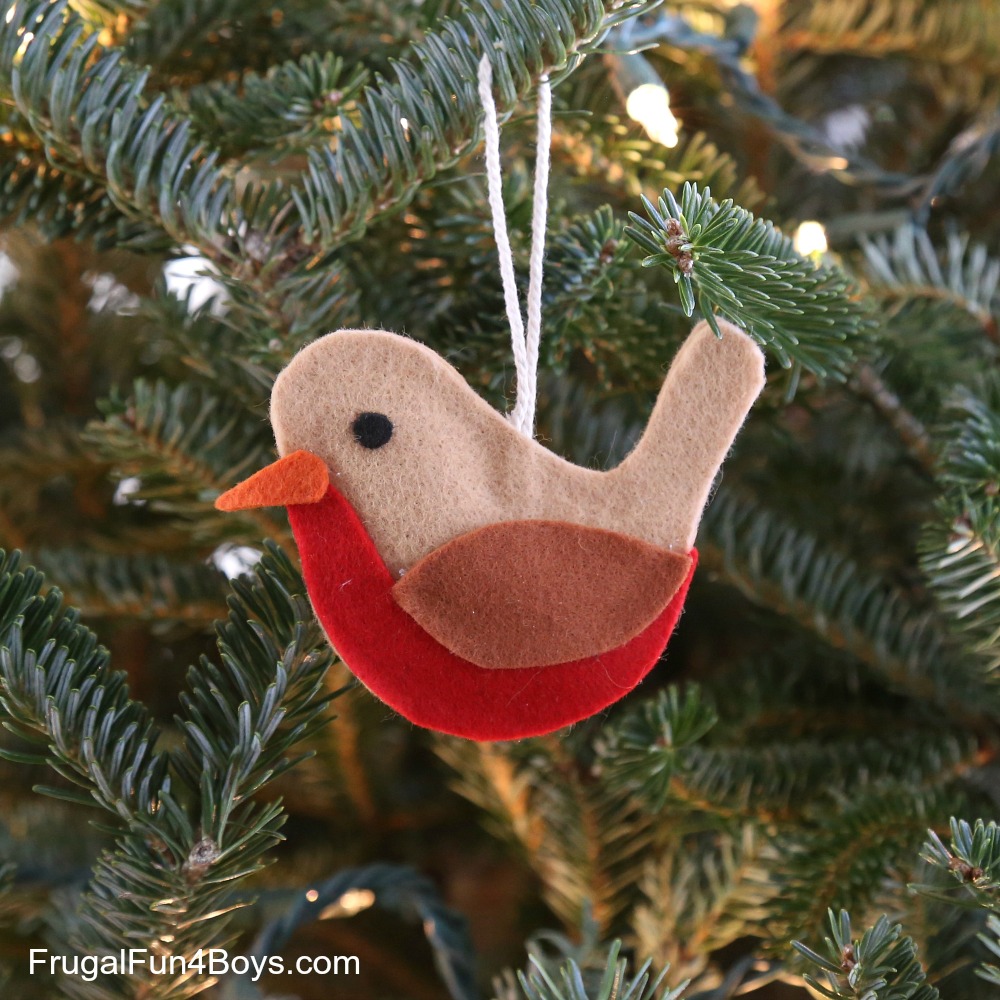
Then brand a bird…
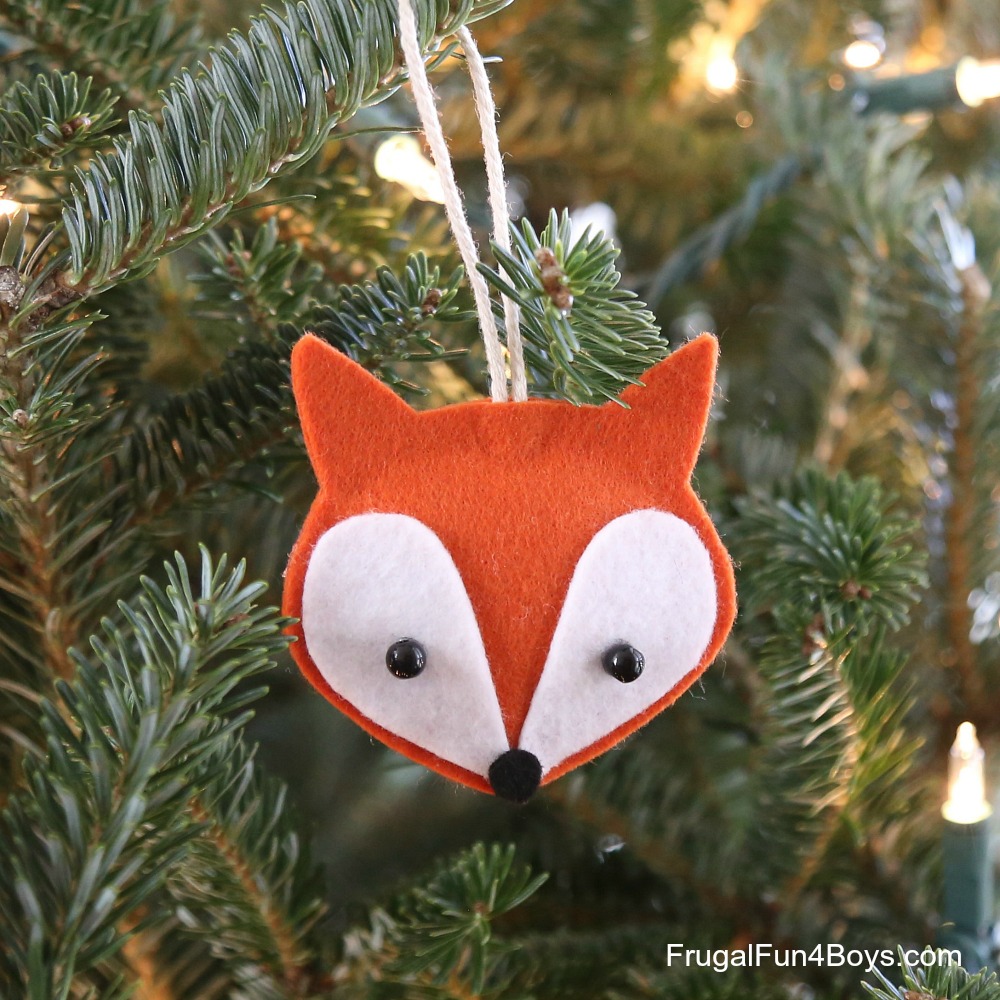
And a fox…
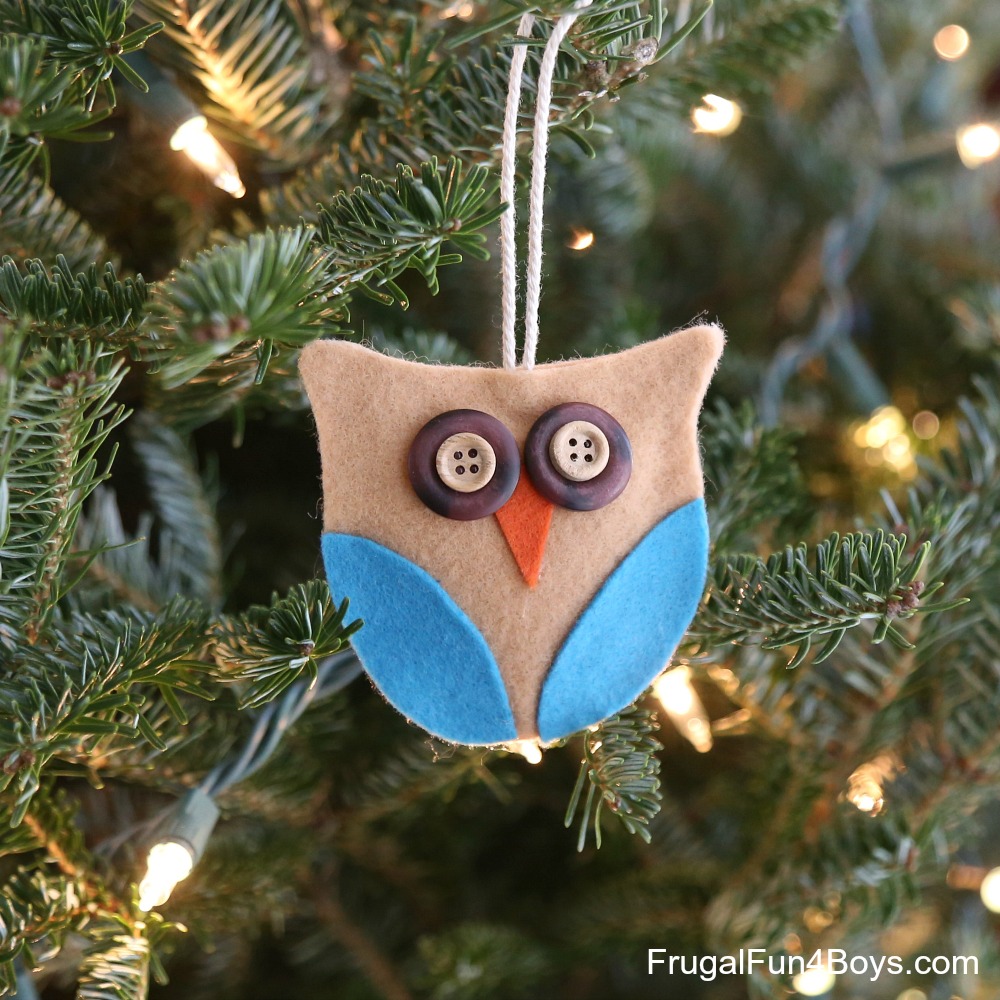
And an owl…
I used buttons for the optics.
And a bunny! Make the bunny's scarf the same way equally the bear. The bunny does not have stuffing in its head, since the size is smaller.

Impress the Patterns
Note that the patterns practise non include patterns for the bear'south black nose, the beaks, the bird'due south eye, and the pinkish function of the bunnies nose. Those are just besides tiny for a design! I think you'll be able to cut them out on your own. Getting the body shapes right is the hard part, and there are patterns for those.
CLICK Here: Woodland Animal Felt Ornamentation Patterns
Source: https://frugalfun4boys.com/woodland-animal-felt-ornaments/
Posted by: robinsonadardly84.blogspot.com
0 Response to "How To Do Woodland Animal Christmas Ornaments"
Post a Comment